ISLAND 4 · PROFESSIONAL TIER · CHECKED AUG 31, 2026
How to Fish Rocks Island
Complete Walkthrough
Rocks is the fourth stop on the five-location story route and the last preparation island before Volcano. Learn the compact island layout before spending your boss lure, defeat the airborne Tuna without losing its body, use that body to trigger Albatross, fight the bird from hard cover, and protect the Albatross Head until the Volcano route is confirmed.
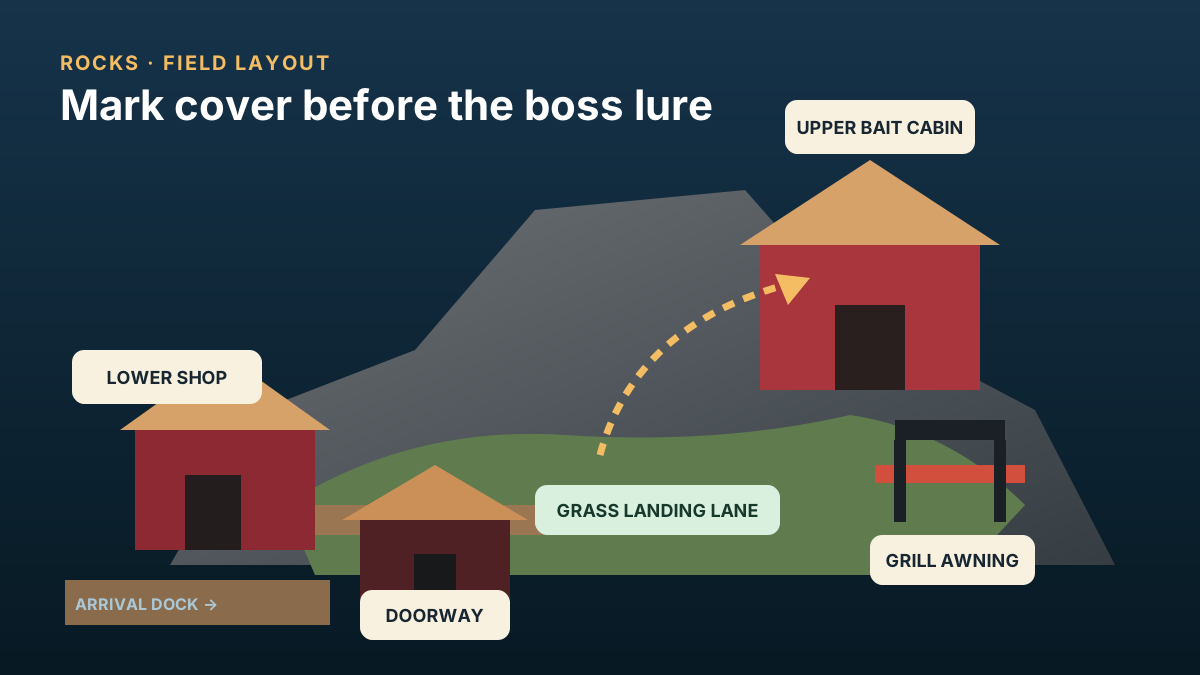
Rocks Island route at a glance
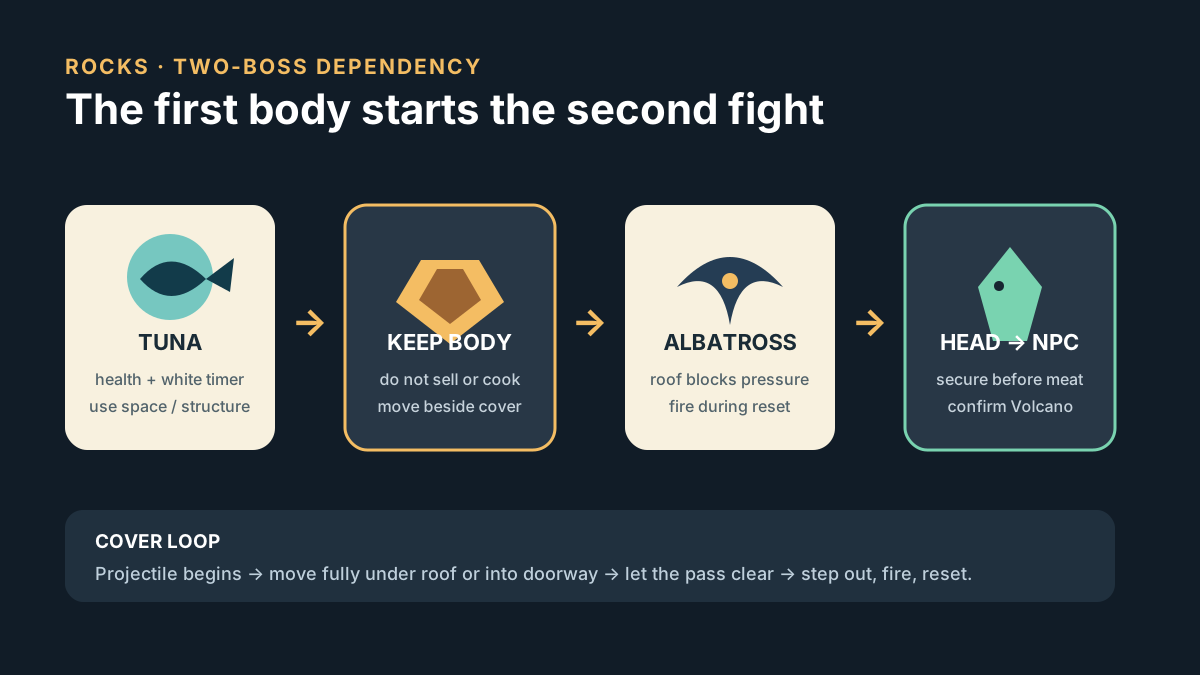
Rocks is a two-encounter dependency chain. The regular Professional Lure is for collection and money; the more expensive Professional Boss Lure starts the Tuna route. The island is compact enough to scout in under a minute: find the lower stilt shop, the upper bait/cashier cabin, the grill awning, the open grass landing lane, and a doorway that can break the Albatross projectile line. Tuna is not the final objective and its first defeated body is not sale stock. Keep it intact, move it beside cover, defeat Albatross, protect the Head, and complete the NPC hand-in before sailing away.
1. Unlock Rocks after the Desert boss hand-in
Beating Pufferfish is only half of the Island 3 objective. Recover the Pufferfish Fin, return it to the Desert Tourist, and confirm the next route marker before boarding your boat. If Rocks does not appear, return to the Tourist and inspect the quest state instead of searching the ocean at random.
- Finish the Tourist request.Receive the Carrot, summon Pufferfish, and defeat it without losing the unique trophy.
- Deliver the Pufferfish Fin.The boss kill does not replace the NPC exchange. Keep the Fin separate from food and sale inventory.
- Confirm the Rocks marker.Open the Radar and verify the new destination is visible before spending fuel or leaving the Desert route.
- Save on arrival.Rocks contains two linked fights. A clean save before buying the boss lure gives you a safer recovery point.
2. Fill the ten-creature Professional Lure pool
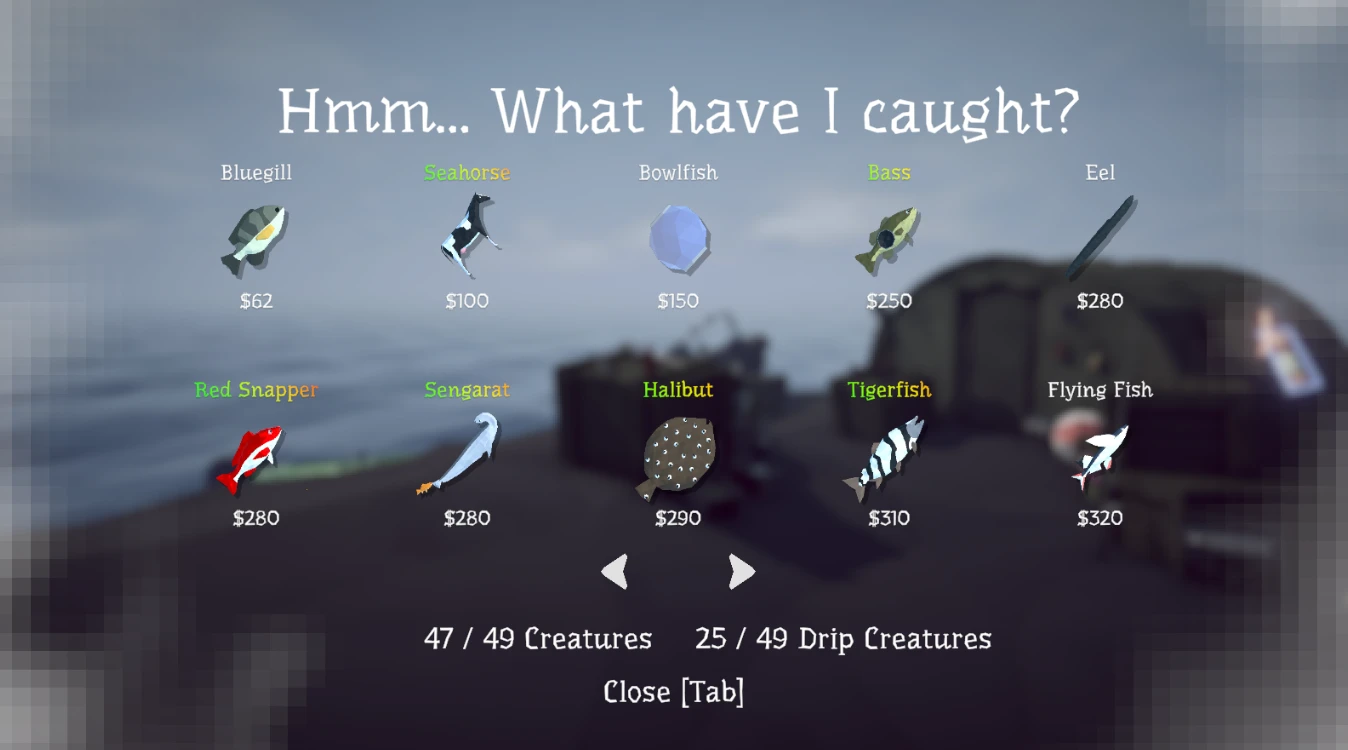
The owner-provided encyclopedia captures show ten regular Rocks entries tied to the Professional tier. Their displayed figures are reported base values: weight, Killscore, cooking, a rare Drip state, and balance updates can change the amount you actually receive. Use the table to identify a catch and compare relative value, not to promise an exact sale price.
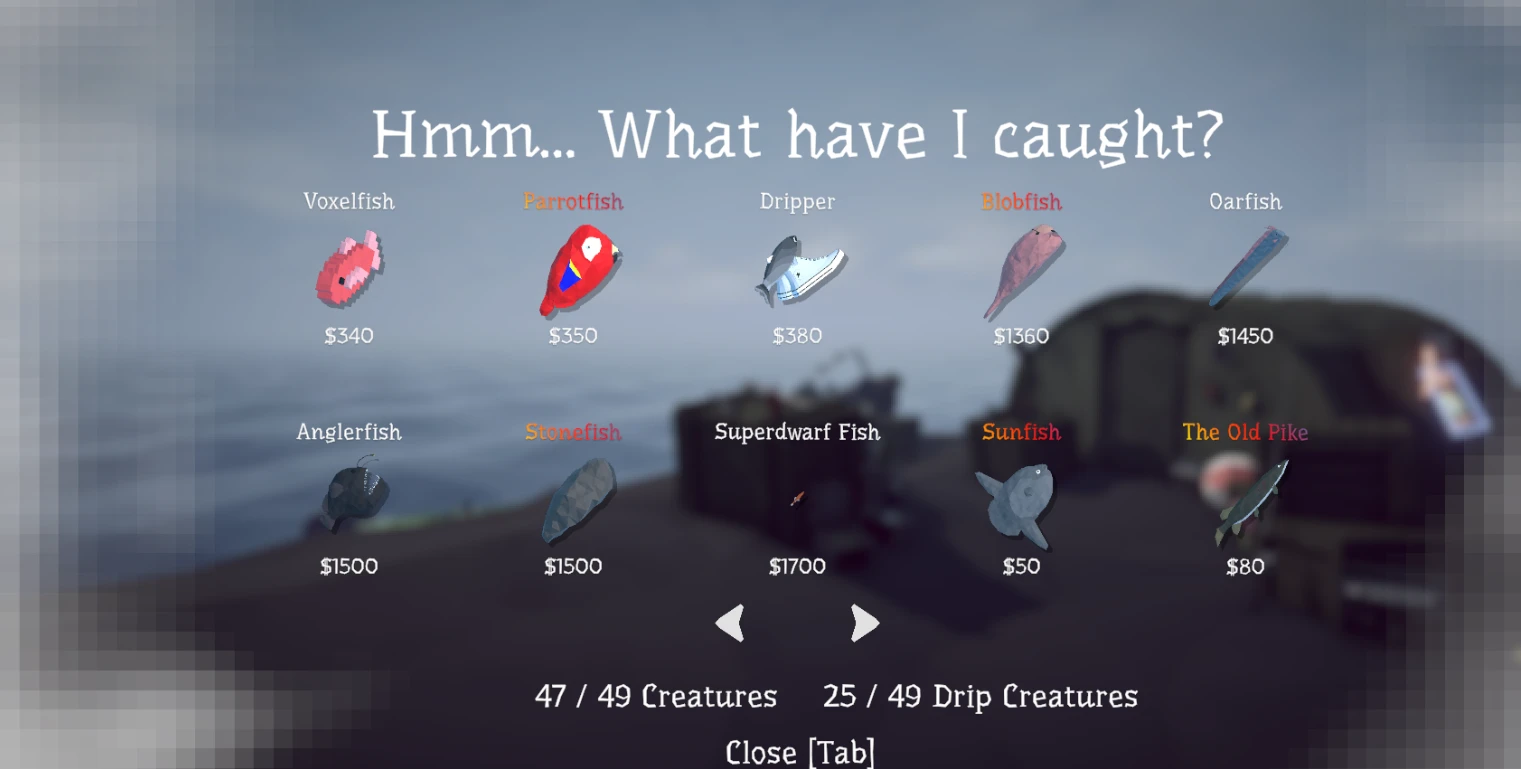
For a focused money loop, land catches away from the water, finish the kill safely, and check the name and value before eating or selling. Dripper has the highest reported base value in this ten-entry set, while Bass is the lowest. A rare Drip appearance is a separate collection target; protect that body if you plan to use the Reel of Fortune.
3. Prepare before buying the Professional Boss Lure
The Patch 1.0.9 recording describes the Professional Boss Lure as a $1,200 purchase, matching the existing route research. Treat the live shop label as authoritative because prices can move. Check the name carefully: the ordinary Professional Lure fills the ten-creature pool, while the Boss version starts Tuna. Do not cast until food, ammunition, two empty inventory spaces, and your cover route are ready.
Minimum loadout
- Professional Boss Lure for Tuna.
- One controllable ranged firearm with spare ammunition.
- Healing food kept away from quest items.
- Space for the Tuna body and later Head.
- A saved route from the grass lane to hard cover.
Optional improvements
- A scoped or accurate rifle for the distant bird.
- A second ranged gun for immediate target switching.
- The captured 1.0.9 shop shows a localized Muzzle Brake at $590.
- Verify the attachment’s current English effect before buying.
- Keep enough cash to replace one failed boss lure.
The video demonstrates two weapon rhythms. One attempt uses a single rifle and accepts its normal bolt/reload downtime. Another alternates two ranged weapons with the scroll wheel to shorten that pause. Treat the swap as an optional Patch 1.0.9 technique, not a required build: animation timing may change, two guns cost more, and a calm single-weapon cover loop is safer than losing both weapons after a death.
4. Catch Tuna without trusting a last-second dodge
Equip the Professional Boss Lure only after selecting a landing lane where the catch cannot immediately slide into the sea. The recording shows Tuna charging across land and becoming airborne. Its body movement is difficult to juke at the last instant, so the safe plan is positional: keep the shoreline behind the target, preserve a route toward the shop structure, and begin moving before the charge reaches you. The orange bar is health; the thinner white bar below it is the escape/time bar. If the white bar empties, the encounter ends even when health remains.
Put the firearm in a known slot and keep the grass landing lane clear of loose items.
The video even fishes from a doorway in one attempt. Use the building to limit approach angles, but do not wedge the body inside collision.
Fire after a committed pass or landing; long hiding pauses can let the encounter expire.
Stop cooking and selling. Carry the first progression body to open ground beside the cover chosen for Albatross.
5. Beat Albatross from a doorway or roof
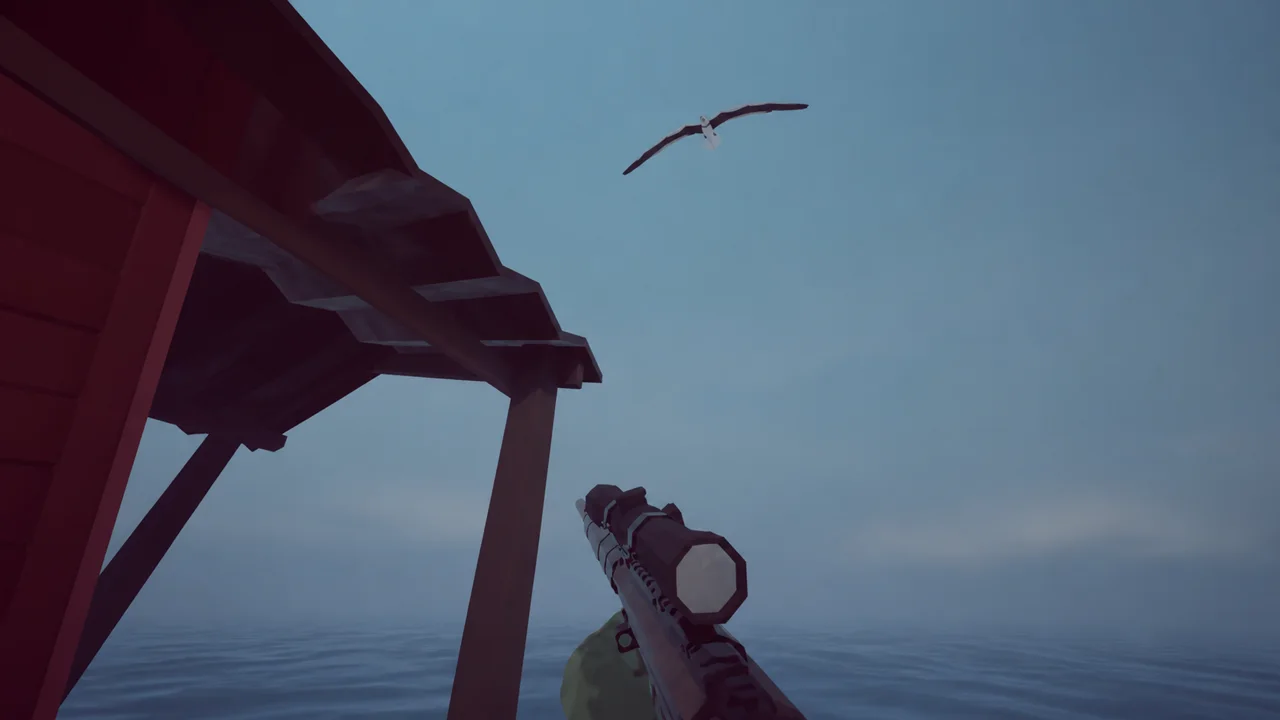
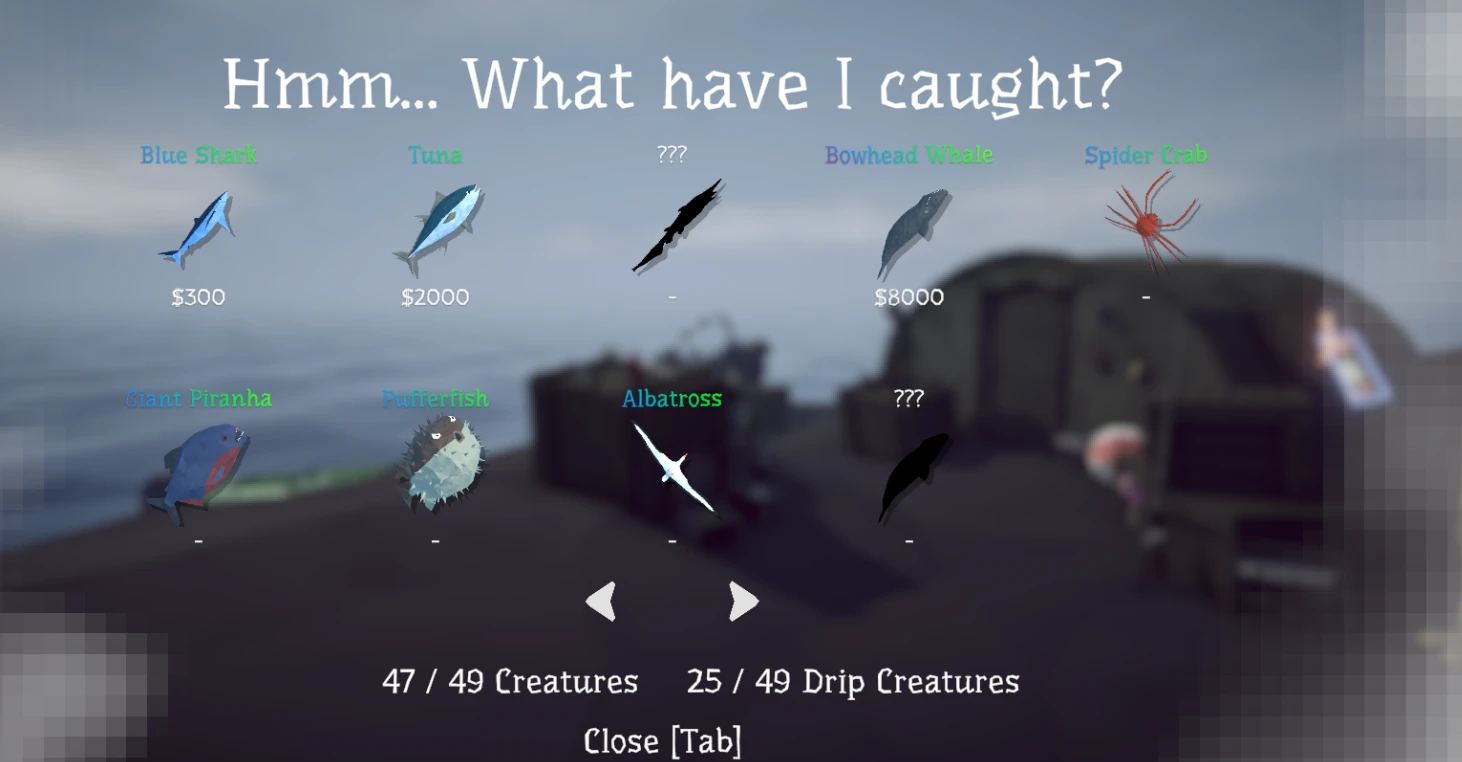
Leave the defeated Tuna where the bird can reach the trigger area, but choose your own position beside the lower shop doorway, grill awning, or another solid overhang. The full recording is unusually useful here: one open-ground attempt ends in death, while the later attempt uses island geometry and controlled ranged fire. Albatross makes long aerial passes and drops or fires white projectiles. Do not stand in the grass trying to win a damage race.
Move fully behind the wall or under the roof as the projectile/pass begins. Watch the bird through the opening, then step out when it climbs, turns, or resets. Lead the target, fire a controlled shot or burst, and return to cover before the next line-up. The white bar beneath health is still active, so do not hide forever—take one safe window per cycle. Two-gun swapping may shorten a bolt-action pause in the captured build, but it is optional and version-sensitive.
If death creates a broken Tuna-to-Albatross state, update the game and reload a clean checkpoint. Official Patch 1.0.10 specifically fixed a case where dying to Tuna, spawning Albatross, and then being unable to respawn could block the run. In co-op, keep the team near the same cover so one player can call the bird’s direction and everyone can find the Head drop area afterward.
6. Return the Albatross Head and verify Volcano
Once Albatross is down, stop shooting and inspect the drops. The progression object is the Albatross Head, not an ordinary Meat Chunk. Pick the Head up before reorganizing food or sale loot, then return it to the Rocks route NPC tied to the scared-islanders objective. The success state is not merely a dead bird: the dialogue finishes and the coordinates for Volcano become available.
Make a save after the coordinate hand-in. Volcano begins the scientific catch tier and the whale finale, so arriving with a reliable ranged weapon, healing food, and clean inventory space is more useful than carrying every ordinary Rocks catch. Sell or bank surplus only after the Albatross Head exchange is confirmed, then continue with the complete Volcano Island 5 walkthrough.